The Bookingbird JavaScript SDK allows you to integrate your full booking experience directly into your Wix website.
You can display a floating “Book now” button or embed booking pages, services, or resources anywhere on your site.
Because of how Wix handles scripts, the Bookingbird SDK should typically be added globally (so it’s loaded on every page).
However, if you only want Bookingbird to appear on one specific page, you can also add the script there instead — see the note at the end of this article.
Log in to your Wix Dashboard and open your site.
Go to Settings → Development & Integrations → Custom Code.
Click + Add Custom Code.
Paste the following snippet:
<!-- Bookingbird SDK Global Integration -->
<script>
  !(function () {
    if (!(window.Bookingbird = window.Bookingbird || []).invoked) {
      window.BookingbirdActions = [];
      var proxy = new Proxy({ invoked: !0 }, {
        get: function (target, name) {
          if (name === "invoked") return target.invoked;
          return function () {
            var args = Array.prototype.slice.call(arguments);
            window.BookingbirdActions.push({ e: name, a: args });
          };
        }
      });
      window.Bookingbird = proxy;
      var s = document.createElement("script");
      s.src = "https://cdn.bookingbird.io/latest/index.js";
      s.async = true;
      document.head.appendChild(s);
      window.Bookingbird.initialize({
        clientId: "your-client-id",
        options: { button: { visible: true, text: "Book now" } }
      });
    }
  })();
</script>
Set Add Code to Pages → All pages.
Choose Place Code in → Head.
Click Apply and Publish your site.
Once published, the Bookingbird SDK will automatically load on all pages.
If button.visible is set to true, a floating “Book now” button will appear by default in the bottom-right corner.
You can modify how Bookingbird looks and behaves by updating the initialization options:
window.Bookingbird.initialize({
  clientId: "your-client-id",
  options: {
    button: {
      visible: true,
      text: "Reserve now",
      position: "bottom-left",
      themeColor: "#FF3366"
    },
    widget: {
      width: 420,
      height: 600,
      borderRadius: 16
    }
  }
});
To hide the global button and only open the widget manually, set button.visible to false.
If you’d like to trigger the Bookingbird widget from your own button instead of showing the floating button:
In the Wix Editor, select your button.
Enable Dev Mode (Velo).
Give the button an ID, e.g. book-now-btn.
Add the following code to your page’s Code Panel:
$w.onReady(function () {
  $w('#book-now-btn').onClick(() => {
    if (window.Bookingbird) {
      window.Bookingbird.open();
    }
  });
});
Now, when a visitor clicks your button, the Bookingbird widget opens.
Once the SDK is added (globally or per page), you can embed Bookingbird components directly into your Wix pages.
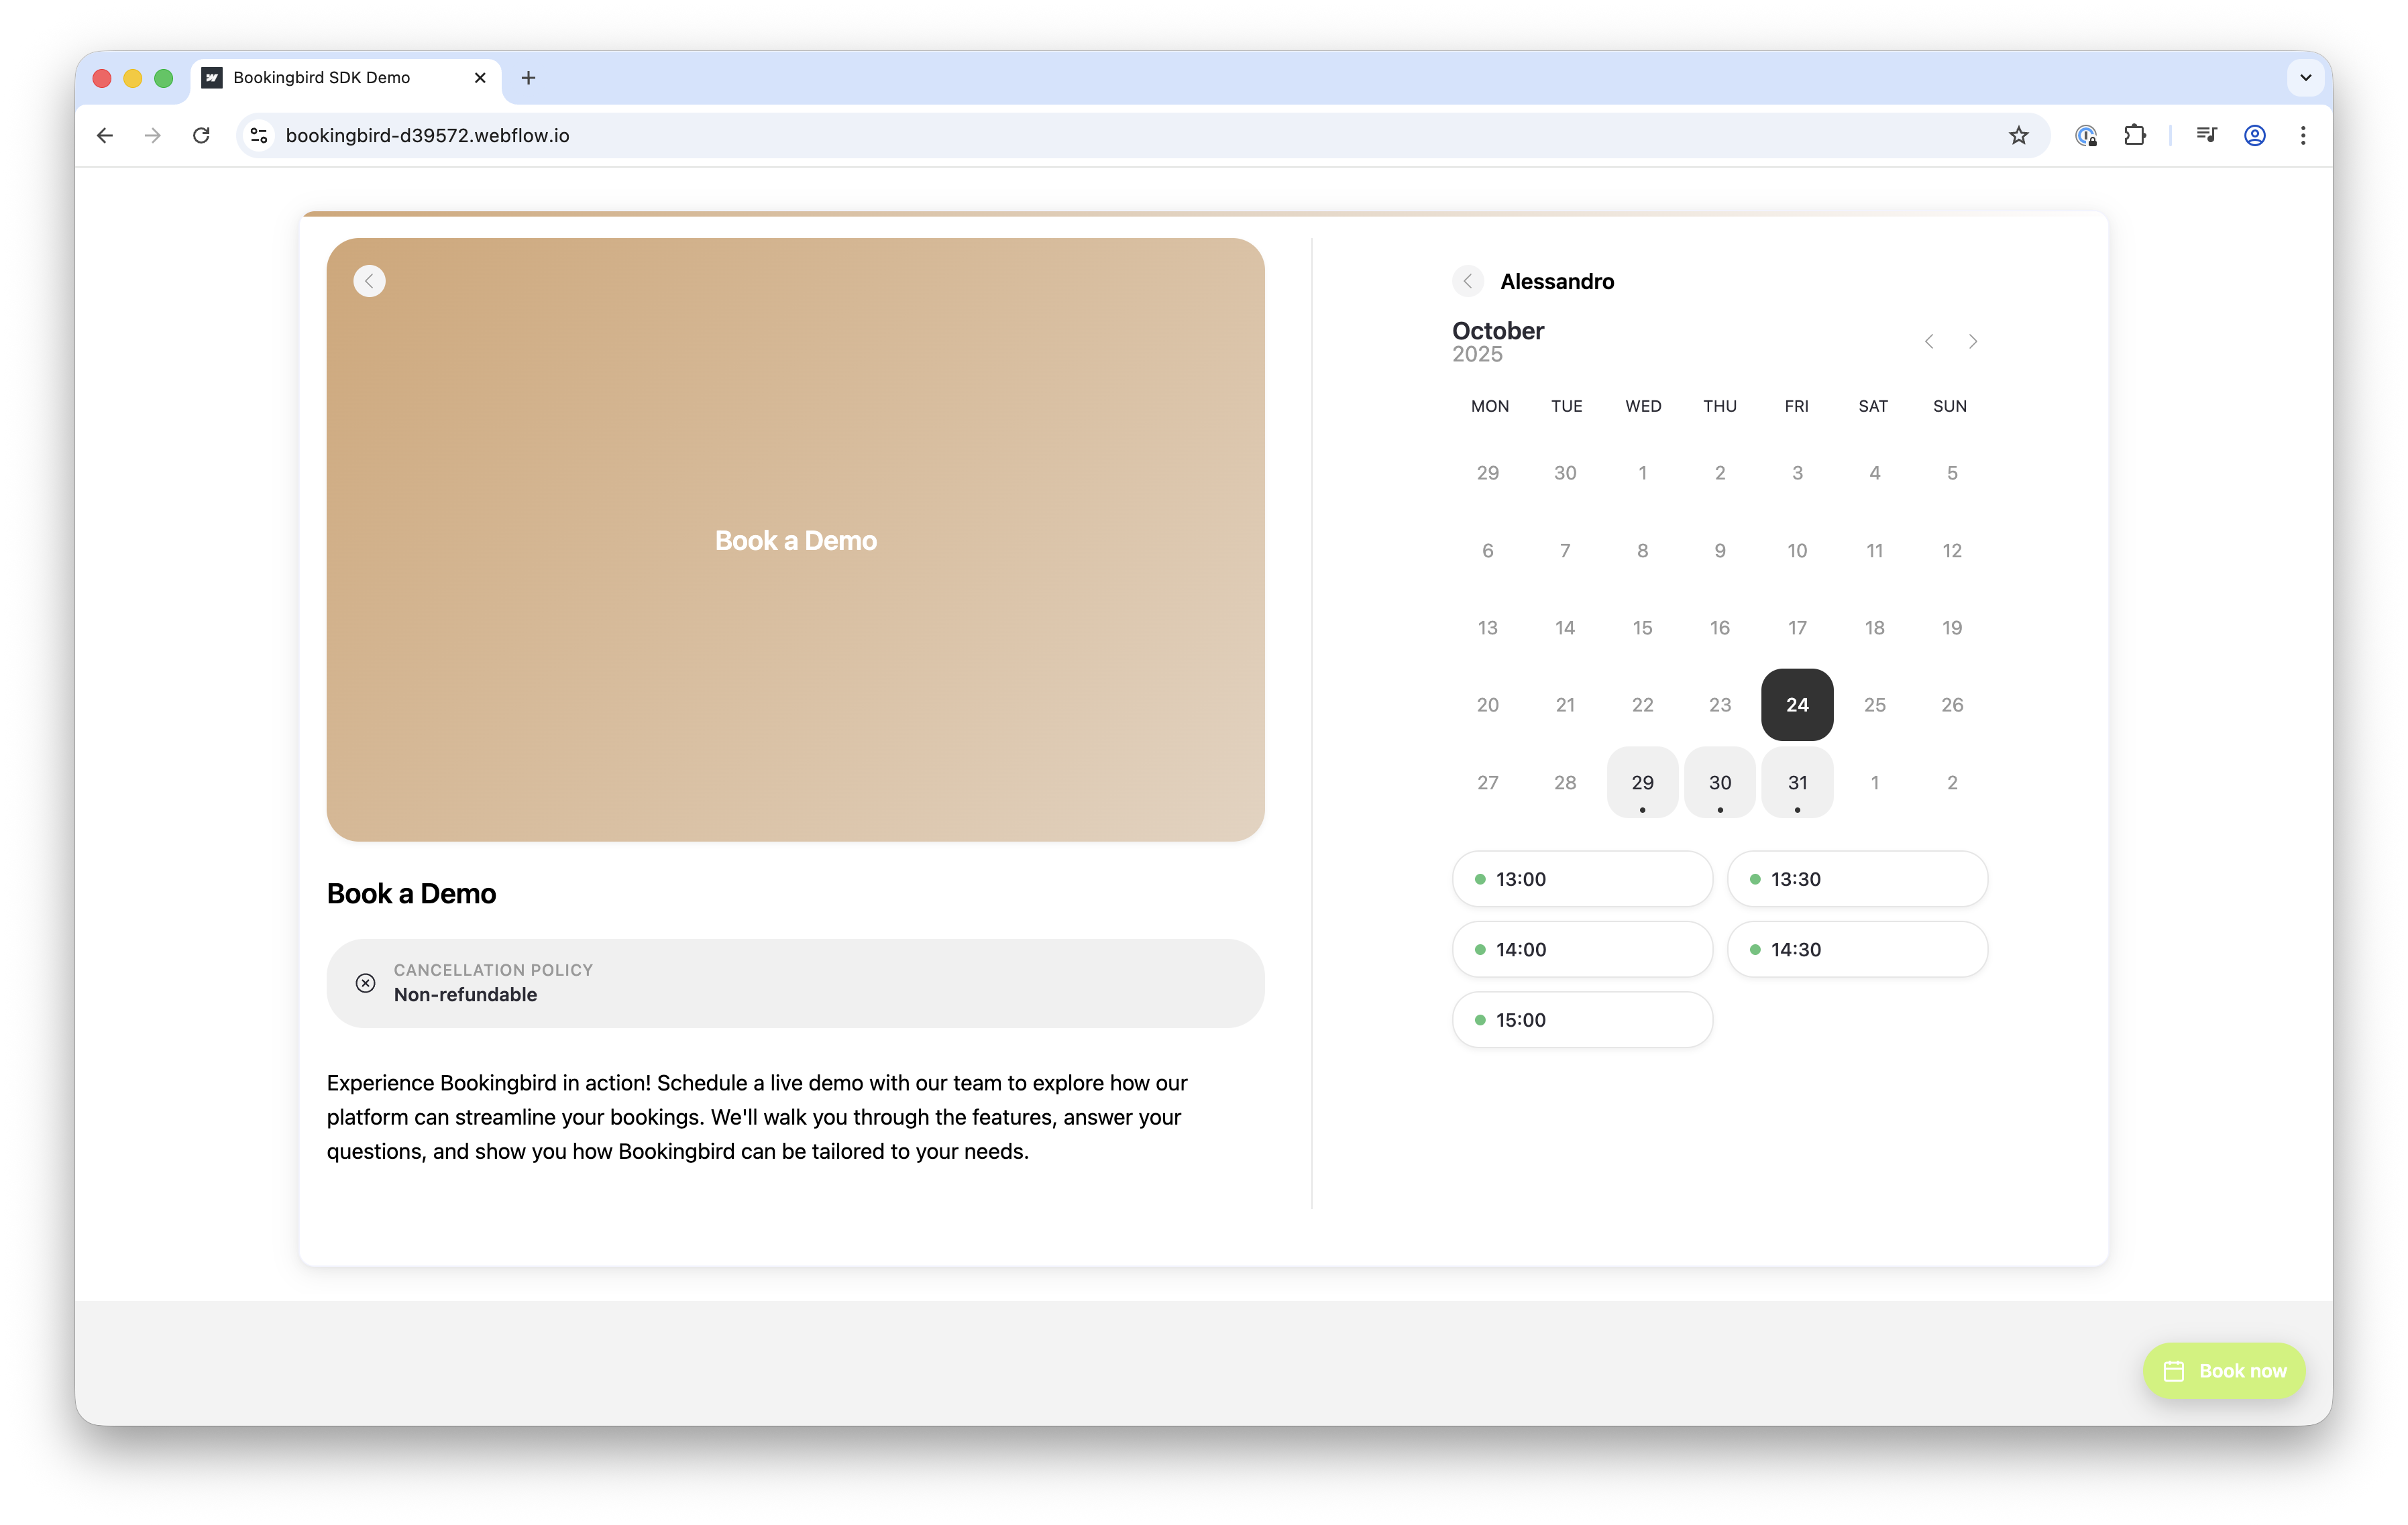
Booking Page:
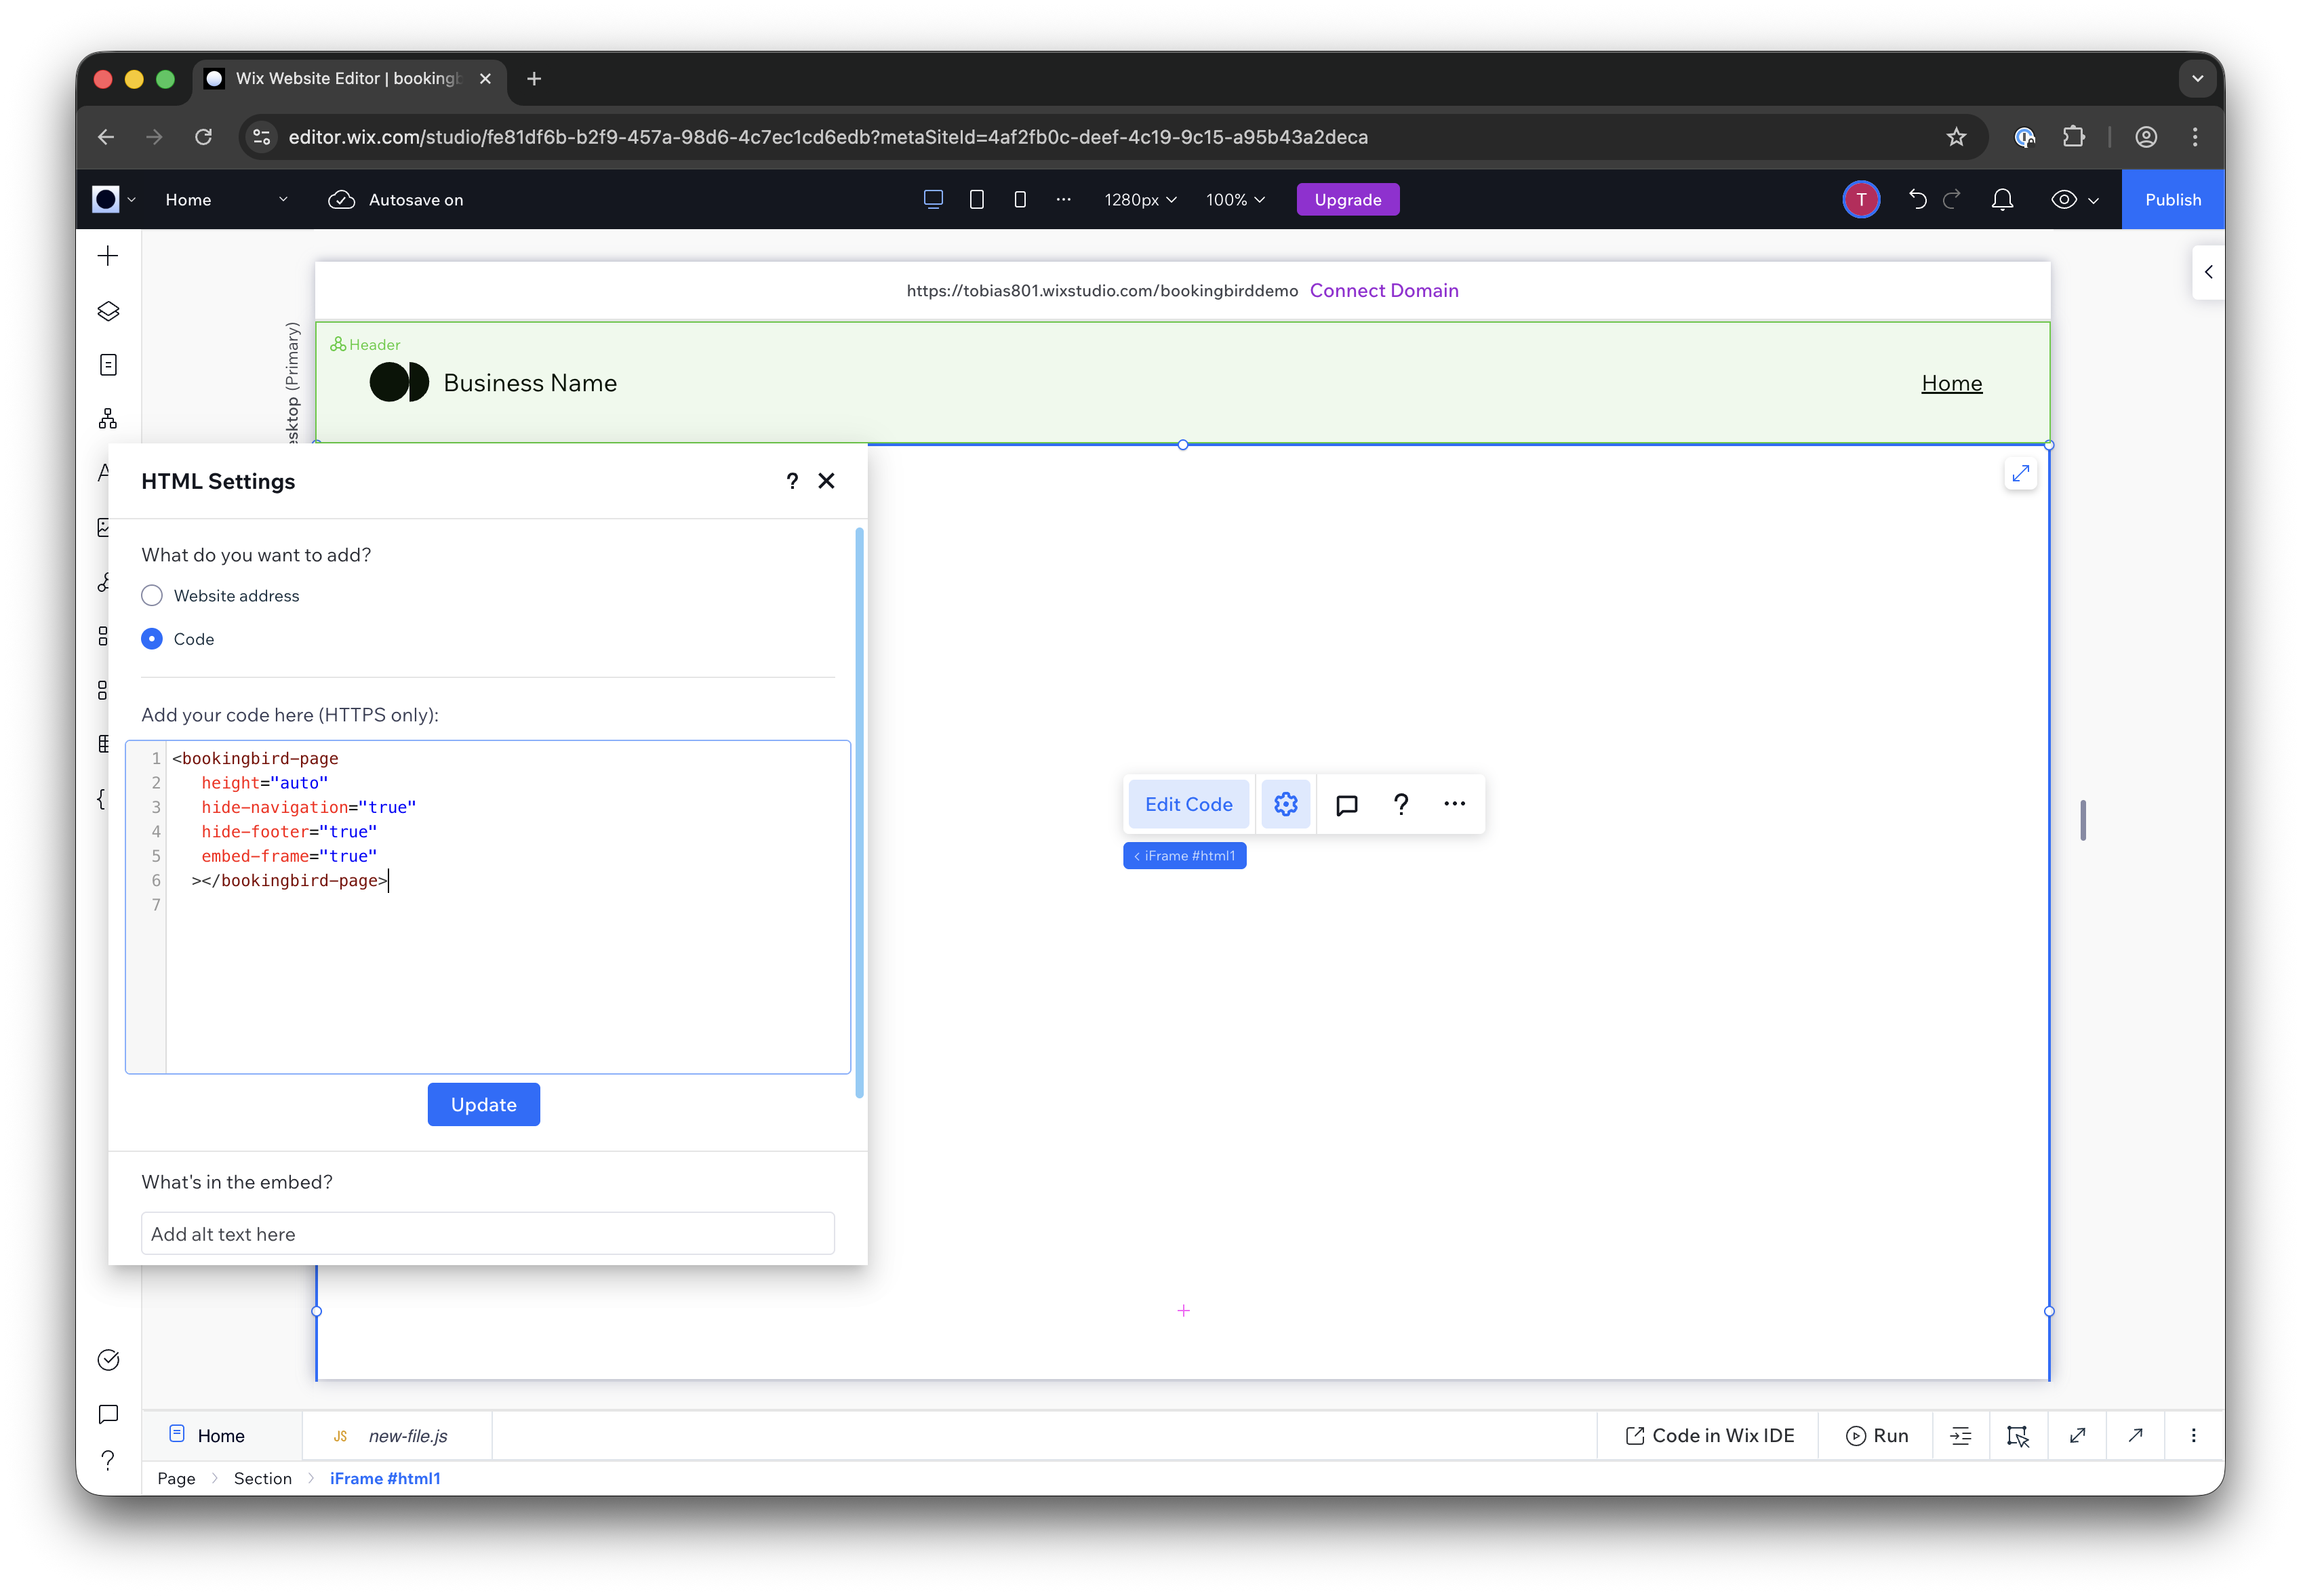
<bookingbird-page page-id="your-page-id" hide-navigation="true" hide-footer="true" height="auto" embed-frame="true"></bookingbird-page>Service:
<bookingbird-service service-id="your-service-id" width="100%" height="auto"></bookingbird-service>Resource:
<bookingbird-resource resource-id="your-resource-id" height="auto"></bookingbird-resource>In the Wix Editor, go to the page where you want the booking element.
Click Add → Embed & Social → Embed Code.
Paste the desired Bookingbird component code.
Adjust the height (e.g., 600px).
Publish your site.
Attribute
Description
| Hides the navigation bar |
| Hides the footer section |
| Sets the component size (default: 100% / 600px) |
| Automatically resizes the frame based on content |
If you use height="auto", Bookingbird will automatically adjust the iframe height via postMessage communication.
If you don’t want to load Bookingbird on every page:
Open your Wix Editor.
Navigate to the specific page where you want to use Bookingbird.
Click Add → Embed & Social → Embed Code.
Paste the same Bookingbird SDK snippet directly into that page:
<script>
  !(function () {
    if (!(window.Bookingbird = window.Bookingbird || []).invoked) {
      window.BookingbirdActions = [];
      var proxy = new Proxy({ invoked: !0 }, {
        get: function (target, name) {
          if (name === "invoked") return target.invoked;
          return function () {
            var args = Array.prototype.slice.call(arguments);
            window.BookingbirdActions.push({ e: name, a: args });
          };
        }
      });
      window.Bookingbird = proxy;
      var s = document.createElement("script");
      s.src = "https://cdn.bookingbird.io/latest/index.js";
      s.async = true;
      document.head.appendChild(s);
      window.Bookingbird.initialize({
        clientId: "your-client-id",
        options: { button: { visible: true, text: "Book now" } }
      });
    }
  })();
</script>
Save and publish your page.
This will load Bookingbird only on that specific page — ideal if you want to keep your site lightweight or only show Bookingbird in one place (e.g., your “Book Now” page).
Verify your client ID is correct.
Make sure the code is added in the Head section (or an HTML Embed if using per-page setup).
Republish your site if changes don’t appear — Wix may cache custom code.
Open your browser console and type Bookingbird — if it returns an object, the SDK is loaded successfully.
Ensure your site runs under https:// (Bookingbird requires a secure connection).
